After sending out Footsteps #81, Mark received the below response.
Here is John's process (with a little Zen embellishment and added graphics):
[For your convenience, the original Footsteps question and tip #81 are included below John's response.]
Hi Mark,
Coincidence! I was just asked on Monday by a client to provide a spreadsheet listing of surface elevations along an alignment submitted last year.
Here is a way to get the ground surface elevations from a graphic profile line already generated from a DTM:
1) Set the desired horizontal alignment active.
a. Create a Profile with the displayed existing ground line

2) Create a line string from the graphic profile line in an active profile window. Select that line to highlight it.
a. The existing ground line should already be a line string, but if it's not for some reason you would have to chain it together, or otherwise just select it all.

3) Use InRoads>Import Geometry>From Graphics and set the Type to Vertical Alignment. Name the vertical alignment and click Apply.

4) Verify that the new vertical alignment is active (it should be).
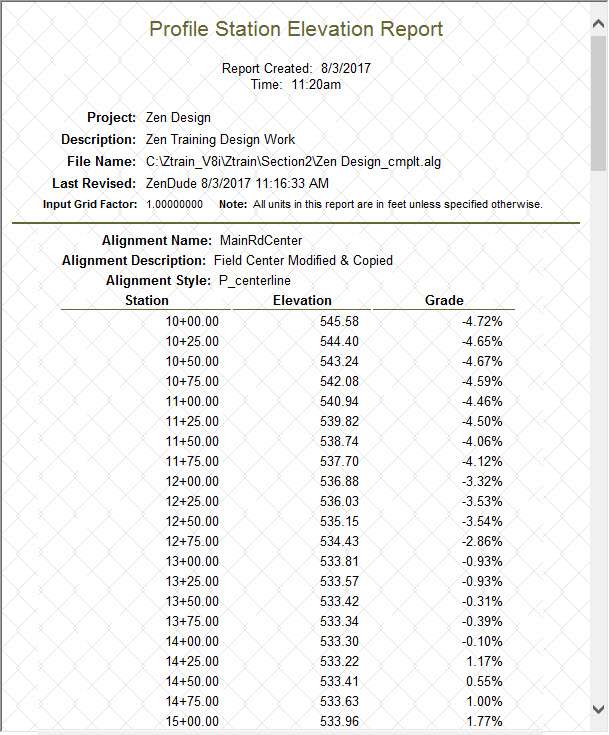
5) Now create the report by using InRoads>Tools>XML Reports>Geometry. Enter the Horizontal Alignment name and enter the desired Interval (e.g. 25) and click Apply

6) Select ProfileStationElevationACII.xsl under Geometry under the Bentley Civil Report Browser to view the report. To save a csv file select File>Save As and save filename.csv
Thanks,
John
John, many thanks for sharing!! I know this is not the first time you've contributed!!
Civilly yours,
- zen
An InRoads user asked if Mark could help him with this design task.
Mark,
Is there a way to print a report that shows the elevation of the existing ground every 25 feet along my design alignment or active alignment?
Thank You for ALL of Your HELP!!!
- Kee

Here is the Zen Dude's response:
Hello Kee!!
Yes, there are a couple of ways that this can be done, but I can't think of a 1-click direct process at the moment.
Here's one way:
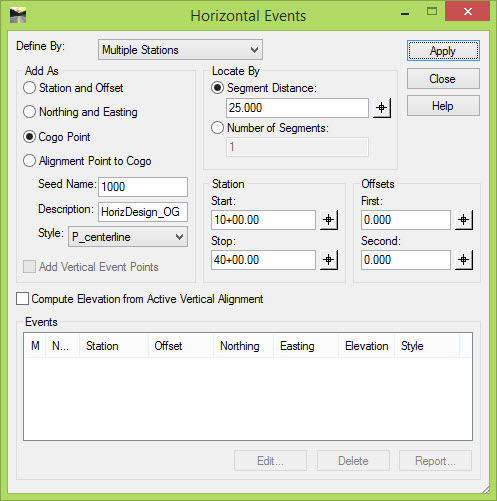
1) Set your alignment active and go to InRoads > Geometry > Horizontal Curve Set > Events, and create Cogo Points every 25' along your alignment. Take a look at the settings here as a guide. They are fairly self-explanatory. If you wanted the elevations along the vertical alignment, that's just a toggle - Compute Elevation from Active Vertical Alignment, but since you want the elevations from the existing, there are a few more steps.
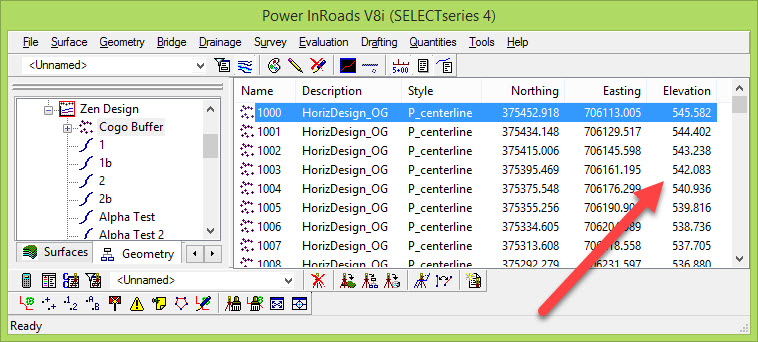
2) Now there are Cogo Points with zero elevations in your Geometry Project.

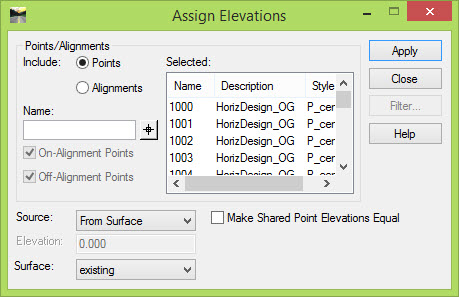
3) The next step will be to assign the existing elevations. Go to InRoads > Geometry > Utilities > Assign Elevations. (Imagine that! ; ) Set it up as shown here with the key setting at the bottom to use the Source set to From Surface and then define the Surface as your Existing surface name.
4) Now elevations have been assigned to those Cogo Points.
5) Next, to report on them, go to InRoads > Tools > XML Reports > Geometry and define the points to report on.
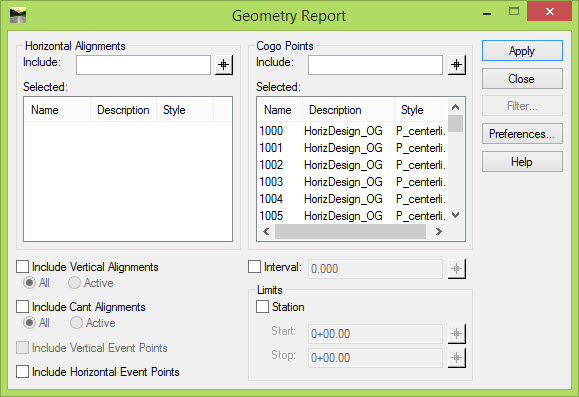
6) Once you Apply that, the Report Browser will appear. Select the format that suits you. I might use the List Coordinates report under the Geometry category.
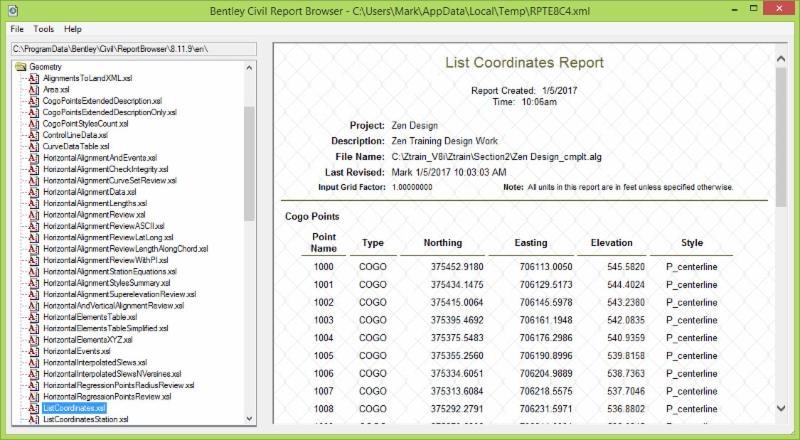
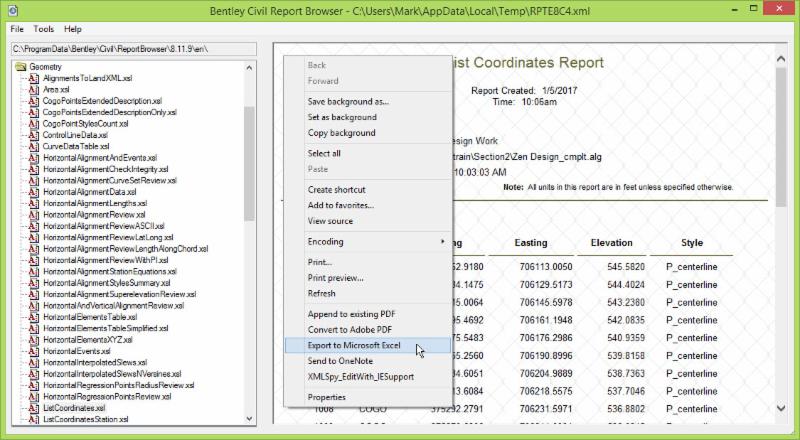
7) You can cut and paste that information into another doc, or right-click in that window and save it multiple ways.
If you get hung up on any of these steps just let me know.
I wanted to get something off to you quickly, so if I think of a faster, better way, I'll let you know.
Enjoy!!!
Civilly yours,
- zen
 Not only does the instructor encourage the students to ask questions, he actually demonstrates an enthusiastic attitude in helping the students.


